


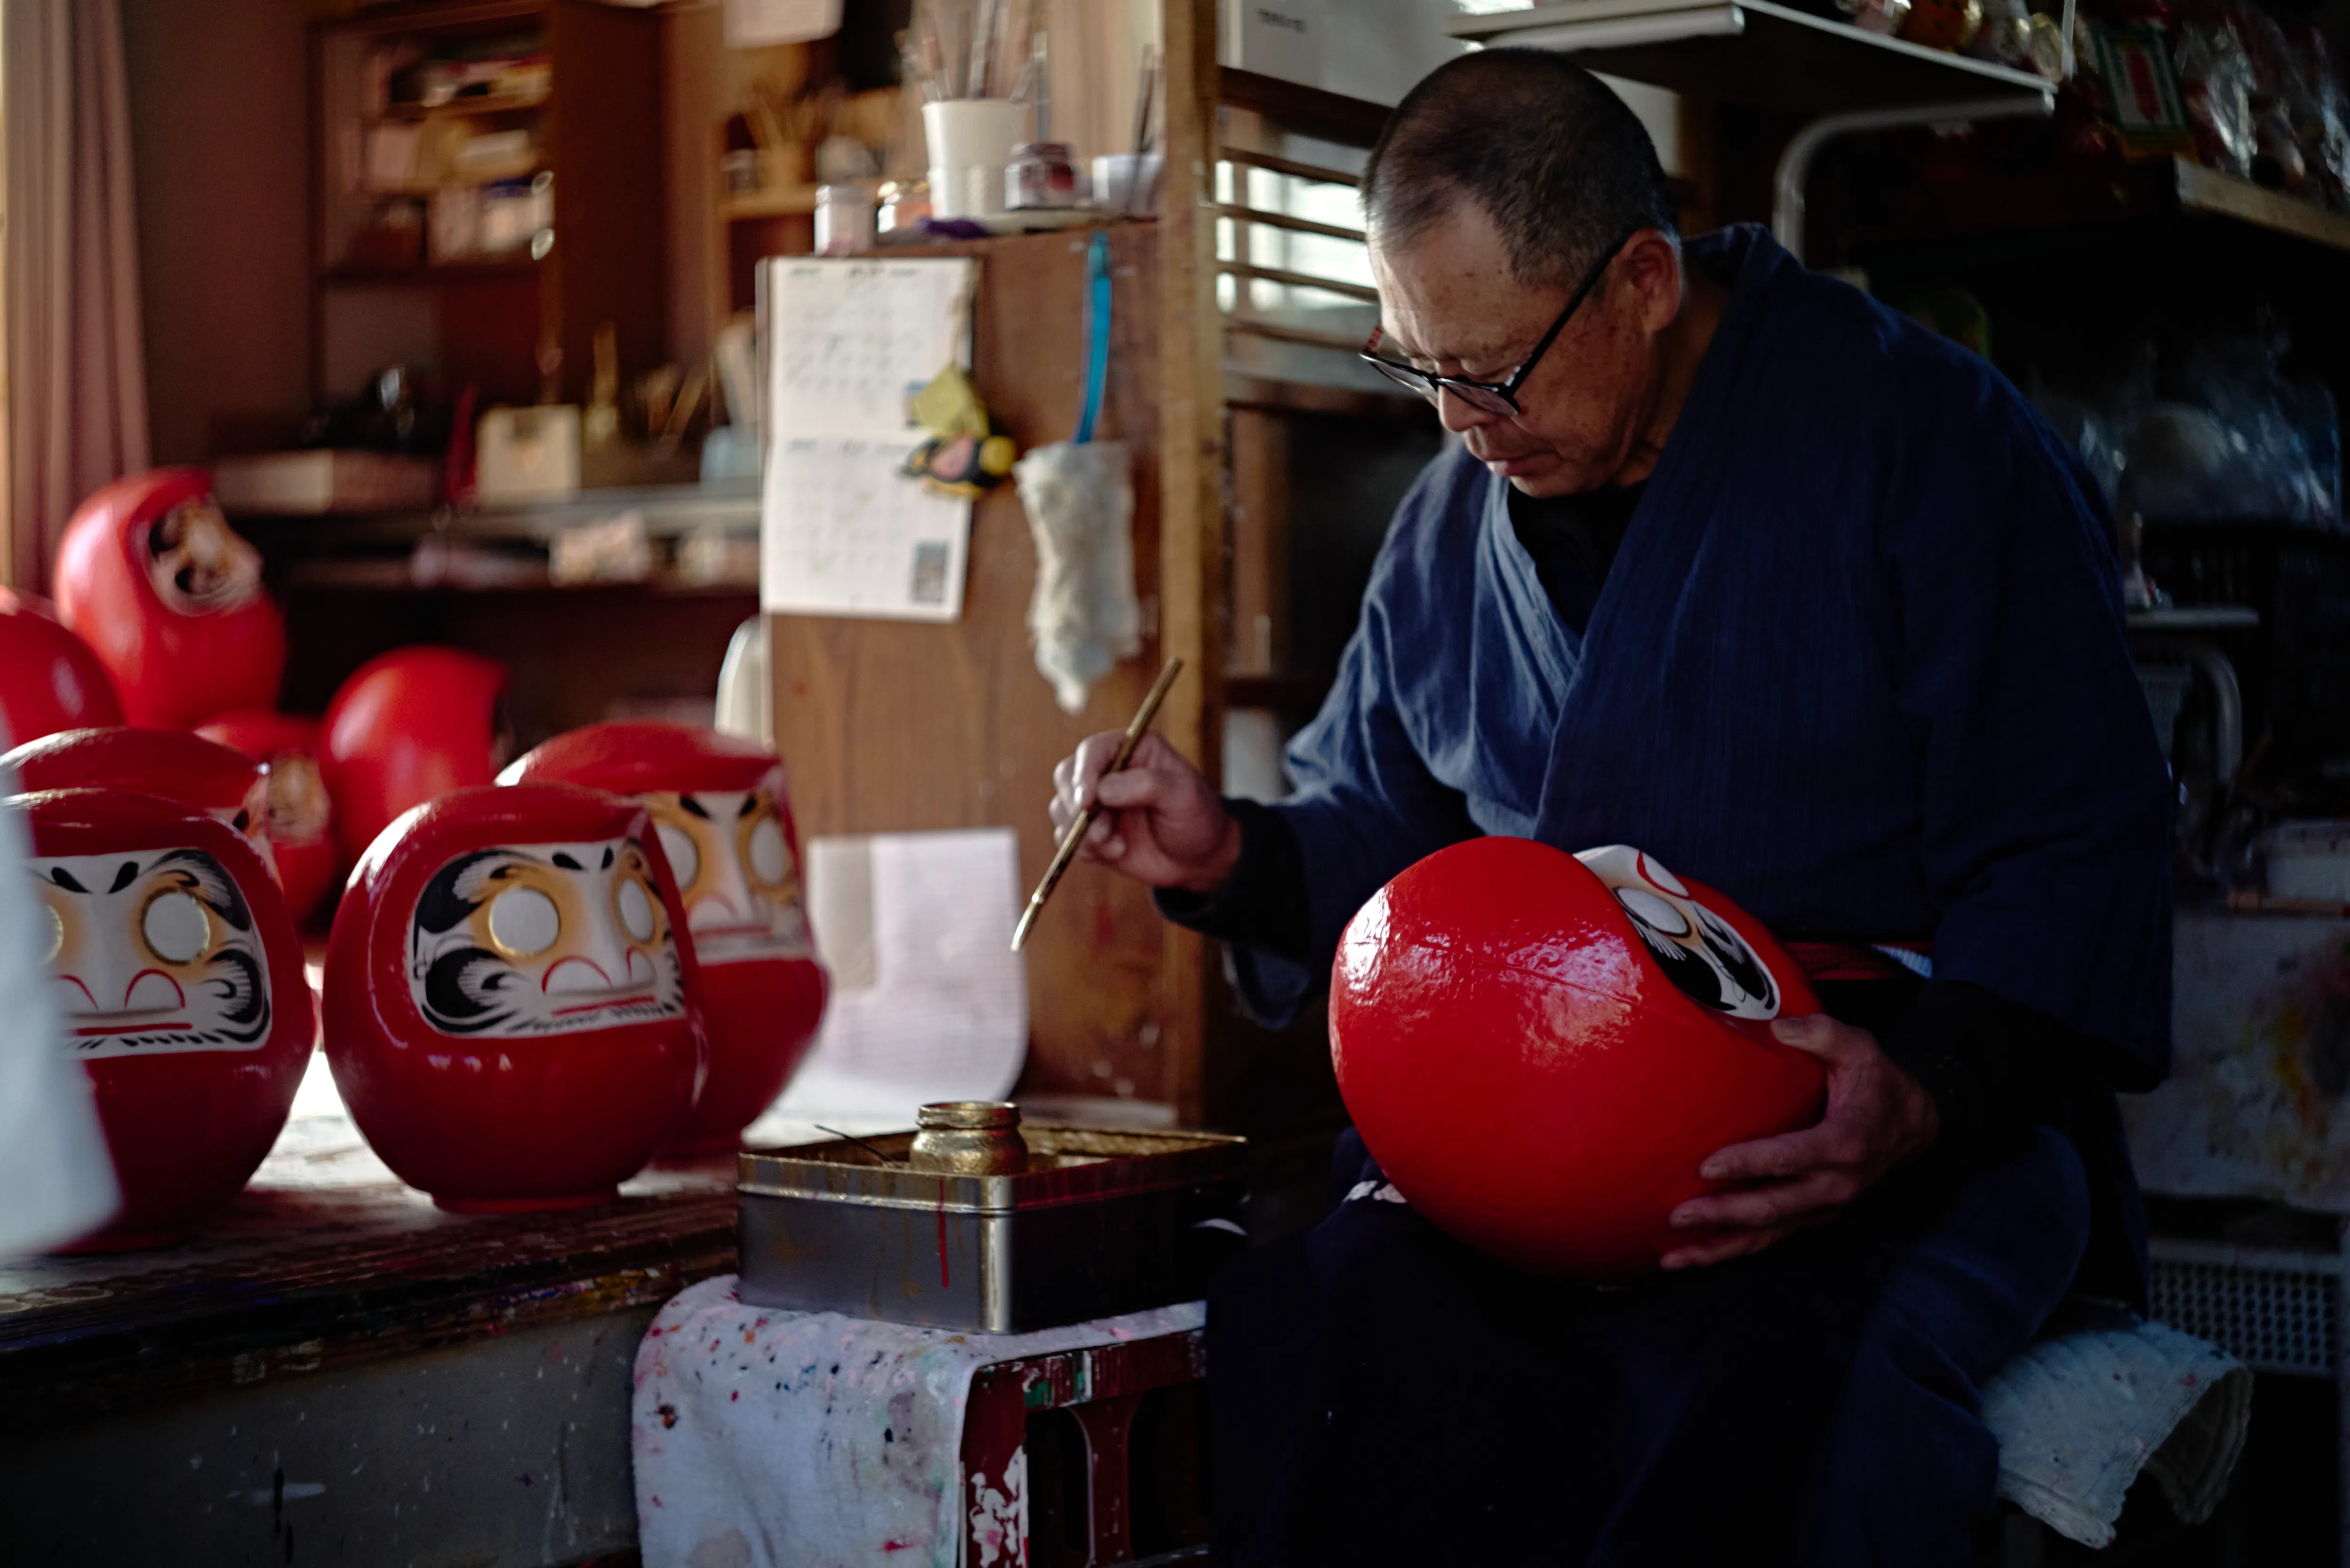

If you want to make your own Daruma, the easiest route is usually not building the doll body from scratch. For most people, it means choosing a blank Daruma or Daruma painting kit, painting the design, setting one goal, painting one eye, and placing the finished Daruma where it stays visible.
A “Daruma making experience” can also mean an in-person workshop, an origami or clay craft, or a longer papier-mâché project. Decide which part matters to you: decorating a real Daruma form, learning with a guide, or constructing an object from the beginning.
Choose your Daruma DIY route
| What you want to do | Best route | Typical commitment |
|---|---|---|
| Paint a recognizable Daruma at home | Blank Daruma or painting kit | One or two sessions, depending on drying time |
| Enjoy a guided cultural activity | In-person workshop | A booked session with instruction |
| Build the paper body as well | Papier-mâché craft | Several stages and full drying between them |
| Make a quick paper version | Origami or paper craft | Short, light setup |
| Model a decorative figure | Air-dry clay project | Shaping plus a longer dry before painting |
| Start the goal ritual immediately | Finished Daruma | No body painting required |
A painting kit gives you the clearest balance of craft and meaning. The body is already formed, so you can spend your time on color, facial details, wish words, and the eye ritual.
What is a Daruma making experience?
In a traditional craft workshop, “making” often means decorating a prepared Daruma rather than manufacturing its papier-mâché body. You may paint the face, beard, characters, or personal design with guidance, then take the finished figure home.
An at-home kit recreates part of that experience on your own schedule. It works well for a quiet afternoon, a gift activity, a family craft, or a small group. You give up live guidance but gain more time to plan the design and let each layer dry.
A full body-making project is different. It involves forming a shell, drying it, adding a weighted base, preparing the surface, and only then painting. Read how Daruma dolls are made before choosing this route; construction takes much longer than decorating a blank doll.
What should a Daruma painting kit include?
Check the actual contents rather than relying on the word “kit.” Some products provide everything for one session; others contain only the blank form.
| Useful item | Why it matters |
|---|---|
| Blank Daruma body | Provides the rounded form, face area, and stable base |
| Surface instructions | Tell you whether cleaning or priming is needed |
| Suitable paint or markers | Reduce uncertainty about adhesion and coverage |
| Broad and detail brushes | Cover the body and control facial lines |
| Mixing tray or palette | Makes custom colors easier |
| Design and drying guidance | Helps you work in a clean order |
| Explanation of the eyes | Connects the craft to goal setting |
If paint is not included, use the type recommended for that particular surface. A papier-mâché body, glazed ceramic figure, and wooden blank do not necessarily accept the same materials. Test an inconspicuous area when the instructions are unclear.
Set up before you paint
Cover the table, prepare water and paper towels if your paint needs them, and place the Daruma on a nonslip surface. Keep wet paint away from food and follow the age, ventilation, and cleanup guidance supplied with the materials.
Sketch ideas on paper first. A simple plan might include one main color, a contrasting face area, a few bold facial lines, and one word or motif. Planning away from the object prevents the design from becoming crowded.
Allow more time than the active painting itself. A layer that feels dry on top may still mark when you turn the doll or add detail. The kit's drying instructions are a better guide than a universal time estimate.
Paint your own Daruma: step by step
1. Choose the purpose
Decide whether the finished piece will accompany a goal or serve only as decoration. If it will be used for a goal, leave both pupils blank during the craft session.
2. Pick the main color
Red is the classic all-purpose choice. Modern colors are often connected with themes such as study, prosperity, health, or relationships, although meanings vary by maker. The Daruma color guide can help you compare them without treating every association as an ancient rule.
3. Paint the largest areas
Start with the body and other broad shapes. Use thin coats rather than trying to cover everything at once. Rest the figure securely and let each area dry before turning it.
4. Add the face and larger motifs
Mark the face area, brows, moustache, and beard. Work from larger shapes to smaller lines. The expression should still read clearly from the distance where the Daruma will be displayed.
5. Add words and small details
If you include a wish word or symbol, practise it on paper first. Leave enough open space for the face and eyes to remain the focal point.
6. Let the whole figure dry
Do not begin the goal ritual while the surface is still tacky. Moving or handling the doll too soon can smudge the paint and make the first pupil harder to control.
7. Set the goal and paint one eye
Once the body is finished, define one goal that has a clear completion point. Paint the first pupil to mark the beginning. Customs differ on which eye comes first, so follow any guidance included with the Daruma. The focused guide to which Daruma eye to paint first explains the common convention and its limits.
8. Display it and complete the second eye later
Put the Daruma somewhere stable and visible. The unpainted eye should bring the goal back to mind without becoming a source of guilt. Paint the second pupil when the goal is reached or when you intentionally close the cycle.
Painting kit, craft kit, or DIY from scratch?
These terms often overlap in product listings, so look at what the activity actually asks you to make.
A Daruma painting kit begins with a finished blank body. It is the most direct choice when you want a recognizable result and a manageable setup.
A Daruma craft kit may involve paper pieces, fabric, embroidery, blocks, clay, or another interpretation. It can be enjoyable, but it may not produce a traditional weighted Daruma.
DIY from scratch gives you control over the body as well as the design. It also introduces structural problems: a weak shell, uneven drying, and a base that does not right itself. Choose it because you want those challenges, not because it seems like the quickest way to own a Daruma.
An in-person workshop adds guidance and a shared setting. It suits travellers, groups, and anyone who would rather learn through demonstration than written steps. Check what is included, the language of instruction, reservation rules, and whether the session paints a blank or makes the body.
Make the design personal without losing the Daruma
Personalization works best when the essential features remain clear: a rounded body, a strong face, readable eyes, and a stable front. You can change the palette, add a pattern, or include a short wish word without filling every area.
Avoid copying another artist's distinctive design. Use references to understand the structure, then make your own choices. A limited palette and one meaningful detail often feel more personal than many unrelated symbols.
For a detailed surface and brush sequence, see how to paint a Daruma at home.
Common problems and simple fixes
| Problem | What to do |
|---|---|
| Paint beads or will not grip | Stop and check the surface and material instructions |
| First coat looks streaky | Let it dry, then add another thin coat |
| Figure rolls while painting | Support it on a nonslip ring or folded cloth without crushing the body |
| Face looks crowded | Remove one motif and restore open space around the eyes |
| Details smudge | Wait longer before handling or turning the doll |
| Pupils were painted too early | Use the figure decoratively or define another visible way to mark the goal |
Common questions
Can I make my own Daruma at home?
Yes. Painting a blank Daruma is the easiest route. Building the body from paper pulp or papier-mâché is possible, but it requires several stages and careful drying.
Is making a Daruma the same as painting one?
Not always. Many workshops and kits use “make” to mean decorating a prepared body. Traditional production includes forming, drying, weighting, and finishing that body before the painting begins.
What is the easiest Daruma craft for a beginner?
A paint-your-own blank is usually the most approachable if you want a three-dimensional Daruma. Origami is quicker if you mainly want a paper activity.
Should I choose a kit or a finished Daruma as a gift?
Choose a kit when the creative session is part of the gift. Choose a finished Daruma when the recipient would rather begin the goal ritual immediately. The guide to Daruma gift meaning can help with the occasion and message.
Let the finished object keep working
The activity does not end when the paint dries. Give the Daruma a clear role, place it where you will see it, and let the unfinished eye point you back toward the next useful action. For the full background and symbolism, read the complete Daruma guide.

